Wednesday, January 30, 2013

Yarning Along...

...with the yarn along.

The Yarn Along is new to me, but what fun! Yarn and reading, two of my favorite things—which I can't do at the same time, total bummer. Books on tape put me to sleep, which is not conducive to craftiness.


Crochet: Sólás Coamh by Jodi Euchner, Interweave Crochet Spring 2009
Yarn: Knit Picks Comfy in Honeydew (not because the mag showed a similar color, but because it matches a certain nursery)
Book: NW by Zadie Smith (halfway through)

Linked to:

Friday, January 18, 2013

When my back is out...

it's a great time for a new crochet project! Since all I can do is sit around anyway—crochet time without any guilt about the house being a mess and errands not being run.

Vapor scarf, wrapped
I grabbed my latest issue of Interweave crochet, looking for something quick to do that I already had suitable yarn for. The Vapor Scarf was the winner.

I used Bertagna Filati Soffice, which is very close to the Knit Picks Aloft called for in the directions.

It took lots of motrin, rest, and 5 days for my back to be at—well, not 100%, lets say 90%. And I have a new scarf. And I have a new crochet project, because my order from Knit Picks came yesterday. No guilt with this next project, it's a baby gift.
It's like jellyfish tendrils!
Linked to: Sew Darn Crafty

Tuesday, January 15, 2013

Cozy Shrug

I have been looking at Lion Brand's Simple Shrug pattern for some time. I like that it looks comfy and loose-but-not-too-loose. Though in my experience, "one size fits all" means "it will fall off your shoulders".

So after a perusal of all the (500+!) versions of this shrug on Ravelry, I decided that making the full-size shrug was not for me. Knowing me, I would probably get tangled up in it, or catch it on a doorknob (see yesterday's post). I also don't like the extra looseness that hangs along the lower back of many.

This was to be a stash yarn project. The original pattern calls for Homespun (yuck! it tears my fingers up), I ad to find something bulky. I don't have alot of bulky. I decided on Patons Mosaic, and ended up using 4 (or maybe 5) skeins.

Front of shrug

Back of shrug
You can see a little bit of the bagginess in the back, but how pronounced it is definitely has to do with your position and how loose it is in front.

It's warm, it's cozy, but not warm and cozy enough for our weather this week!

Linked to: Sew Darn Crafty

Saturday, January 12, 2013

From old comes new

This is an old apron my mother-in-law made for me several years ago. I love the style of it (with a front and back and no ties), my grandmother always wore this style of apron. So I associate it with garlic-studded roasts, roasted potatoes, and ravioli.

Poor ripped apron
So, I wore this apron a lot. Enough for the white pocket edge to get very stained, and for the left side to also get very stained—you can kind of see it in the picture, but this print hides stains quite nicely.

So, I wore it a lot. But it was a little big for me, and I finally caught one of the elastic sides on a doorknob, and...well, you can see the rip.

I washed the apron and put it into my scrap bag, because an apron doesn't really work for cooking with a big hole. And, I have made and received a few aprons since, but none have pockets. Before we got chickens, I didn't care too much about pockets on aprons. But now I have eggs to collect, and sometimes there are 6, which don't fit into jacket pockets or my hands. And isn't this chicken print perfect for an egg apron?

Enter the pattern Granny's Clothespin Apron fro the book One-Yard Wonders. I did not have an actual full yard from the old apron, but I can make this work, right?

Well, kind of. As usual, I managed to pick the one pattern from the book that actually has tons of errata–a link to which I found on Flickr after fighting through the pattern. Howeverm if I had known about the errata I would have been sure I didn't have enough fabric, so perhaps it worked out for the best.

Finished!
It's not clear from the picture, but the apron has one large pocket across the front, with curved sides—they can faintly be seen in the photo above. I ended up cutting only 2 ties pieces (vs 4), and using those elastic sides because my ties were not as long as called for.  I muddles through the side binding (very poorly written)—and the errata involve those side bindings, the waistband, and the ties. Of course. In the end, my ties wrap around and tie in the front, even though they are still short per the pattern. And I only needed the 2 tie pieces because the waistband as written was half size—so I actually made it work perfectly. Accidentally.

But it fits just fine and can easily hold 6 eggs. It could probably hold 36 eggs!

It fits!

 The length of this apron is about equal to the width of the old one. I managed to get the large piece out of the back, and the large front pocket out of the front of the old apron (working around the hole, after ripping off the pocket (which resulted in one small hole to avoid). The ties came from the pocket and a leftover piece of the back, and the bias cut facings came from the back and front. And I even have a few scraps of chicken print left.

I will probably also use this apron while gardening—I have already used it when cleaning the coop, because I always get covered in wood shavings. This helped a lot.

Linked to:  Sew Darn Crafty
                     Fabric Tuesday

Sunday, December 16, 2012

Leather Sketchbook Cover, with Pocket

Front
 A recent whimseybox contained a piece of soft leather (approximately 8.5 x 11"), and some metal studs.

I have looked at the box contents pretty regularly, but was undecided on what to do. I knew I wanted to paint on it—but on what?

Back
 After rejecting a variety of ideas (maybe purse straps for a sewn purse? or a purse bottom? but this leather is so soft it's almost suede, and will get filthy fast; maybe I would use a clutch? nope...; a bracelet or 4? no, this soft leather doesn't have the body of a stamped leather bracelet) and some pinterest searches, I settled on a basic wallet and/or sketchbook cover. And, I would use every piece of the leather!

Cutting guide
First, I squared up my piece of leather. Then, I cut the piece in half, so I had two 8.5 x 5.5 pieces. One of these became the main body piece. The other I cut into three pieces, each 5.5" wide—one 2.5" long, one 3" long, and the rest became the pocket flap.

 I first sewed on the sketchbook-holding flap, using binder clips to hold it in place, and the teflon foot on my sewing machine (and a size 90 stretch needle, as specified by my machine). Then came the pocket body, and then the pocket flap. Then I hand sewed the snap in place (a vintage snap from my grandmother's sewing basket).

Inside, with notebook and pencil
Next up was the painting, which was much more difficult than I expected—it took so much paint for the paint to show. I don't know if it is the soft texture of the leather, the acrylic paints, the brush I chose, or operator incompetence. I did the outside, waited an hour or so, and then the inside. Then I let both sides dry completely overnight.

Pocket snap and inside painting
The next morning I chose a piece of ribbon for the tie (part of the whimseybox packaging!). I then cut two slits for the ribbon to go through, and where a pencil can go.  After threading the ribbon through, I "painted" the ends with fraycheck.

Supplies and finished project
I want to put a small sketchbook in this, but all I could find was the small composition notebook at CVS (and all they had was red or blue!). An eraser, colored pencils, or cash and ID can fit into the pocket.

Thanks to the following sites for inspiration:
Vintage Craft Studio on flickr
the Kenton Sorenson wallet
World of Pineapple leather tips and tricks
Martha Stewart's leather crafts

Linked to:
Sew Darn Crafty

Sunday, December 9, 2012

Winter Coasters

Winter-themed coasters

 A recent Whimseybox included 2 unfinished tiles, a small bottle of modpodge, and a foam brush.

I have been thinking about making coasters, but finally pulled together my idea. Winter! Now that I have finally had to wear a scarf a couple of times, it finally feels wintery around here.Which means tea! And hot apple cider!

First, I painted the coasters with blue water color (of the cheap-o kid variety, it's what I had). I wanted this to look uneven, like the sky. I also painted part of a card, for cutting shapes.
Painted coasters, and a card for cutting.
What shapes? Snowflakes!
Snowflakes, mid-modpodge.
I cut some snowflakes, modpodged the coasters, and stuck a few on. Then modpodged over them.

Next, I cut 2 pieces of blue tulle that came in a past whimseybox. I wanted to add some texture—but not too much, because coasters and texture don't really mix. I put the layer down, added more modpodge, and then added a few more cut shapes, and more modpodge. And then a sprinkling of Crystal Snow superfine white glitter. My coasters need sparkle!

Paint, shapes, tulle, more shapes, glitter, beginning to dry.
After leaving them overnight to dry, I turned them upside down and trimmed the tulle—the coaster itself was the straightedge.

 The next day, I cut some oversized pieces of light blue felt I had on hand, modpodged the bottom of the tiles, and stuck the felt on. Then, I felt like they needed something else. I found 2 different snowflake stamps in my drawer, and silver and platinum ink pads. The coaster on the left has platinum, the right one has silver. (Tip: when using cheap-o kids foam stamps, don't press too hard! They collapse. Oops.)

Stamped!
I left them overnight again, to dry completely. On day 3, I trimmed the felt, and then sprayed the tops with 2 coats of acrylic sealer.

Done! With all supplies (except for tulle and felt).

Now I need a cup of tea!


Monday, September 10, 2012

What I Want to Be Doing...and What I Have Been Doing

What I want to be working on:

Looptastic Mini Quilt from class with Elizabeth Hartman

What I have been working on:

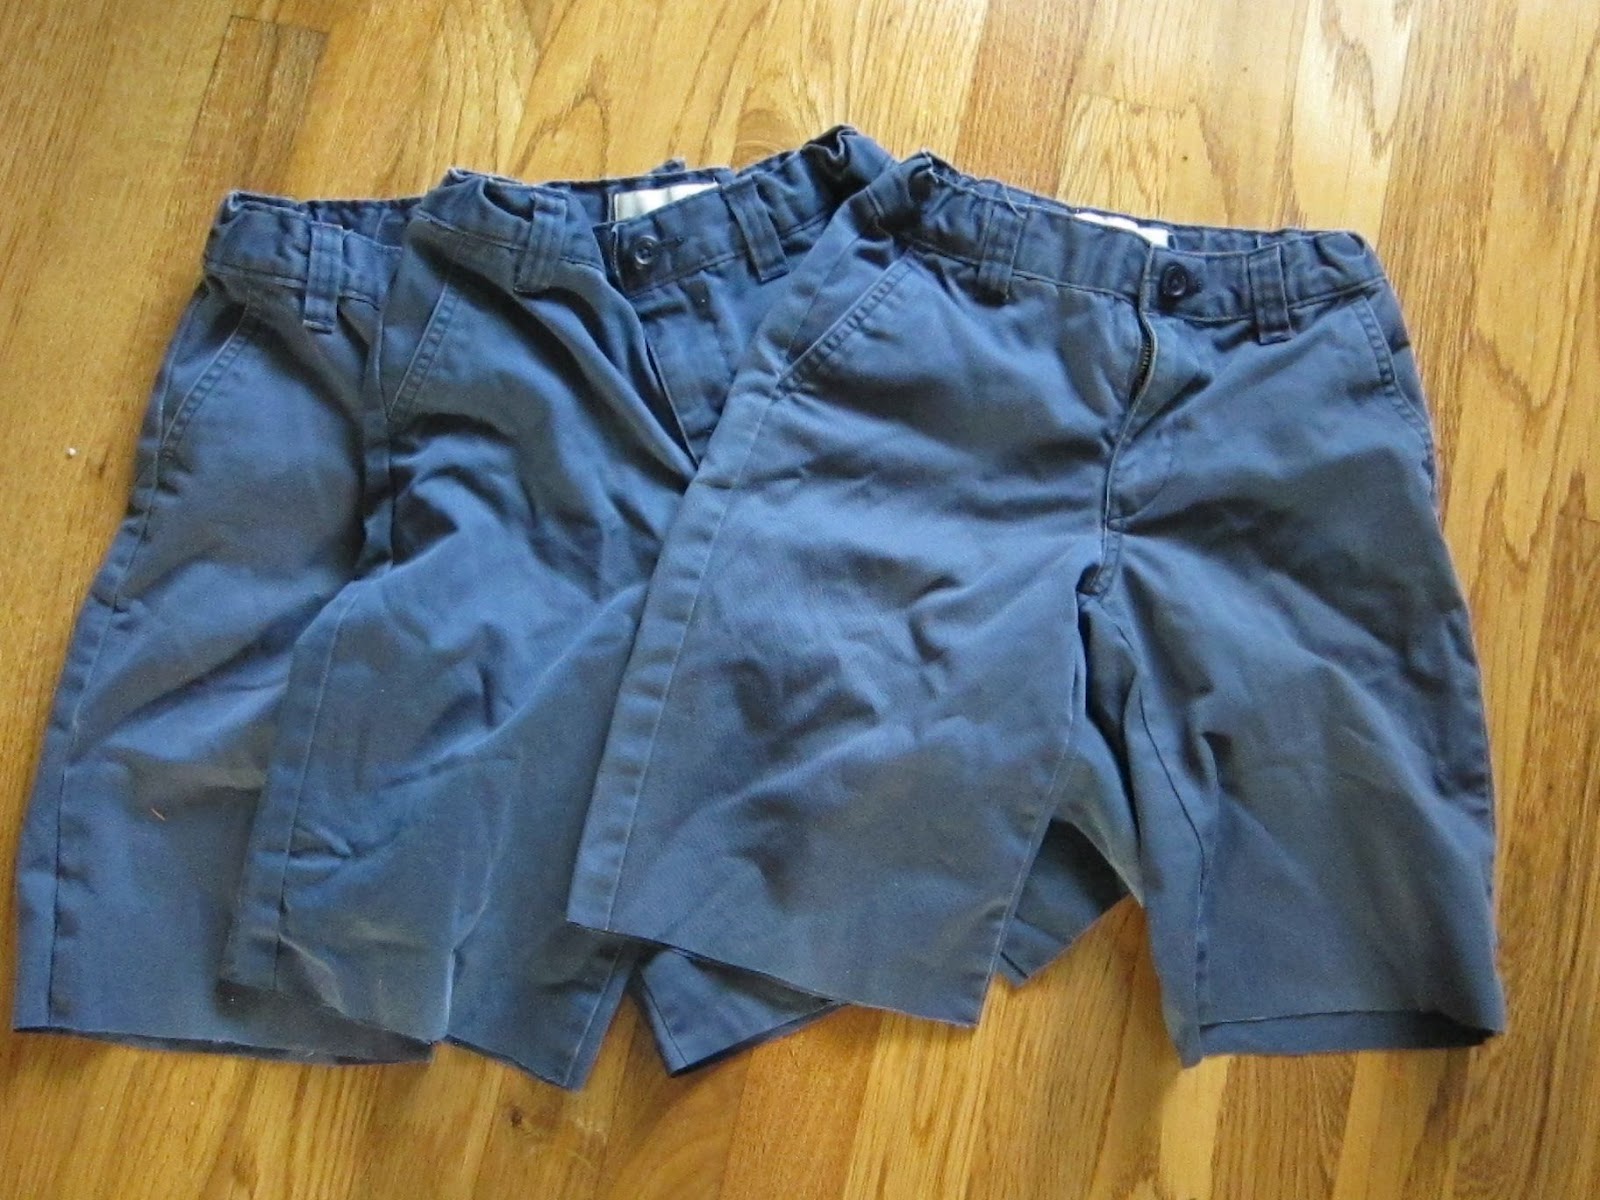
4th grader's uniform pants—4 of these!

Cut

Hemmed
Last August I bought E-man 5 pair of uniform pants and 1 pair of shorts. He never touched the shorts, and then in March I had to get 3 more pair of pants because of the ripped knees (and it is always the left knee). I believe I cut off the others and gave them to Goodwill (since E refused to wear shorts.

It has been so hot since school started. (I mean so hot—at 6:40 this morning it was 80° inside.) At least he and his brother gets to sit in classrooms with a/c, while I broil at home. So, he finally tried his shorts, which thanks to the adjustable waist fit just fine. He now only wants shorts, so I got his 3 ripped pair out of the drawer. Finished them (there are only 2 in the bottom picture because he was wearing the other pair at school.) Then he found another pair of pants in some drawer that would last maybe 1 or 2 more wearings before being ripped too. So, now I have done 4 pair. I can now do 1 pair in 15 minutes, yay me.

Linked to: Sew Darn Crafty Week 82